This Vegan Gluten Free Sponge Cake is a whole food, delicious version of the classic Victoria Sponge Cake. Great as a celebration cake!

For the longest time I didn't eat a lot of cake.
I found it really difficult to adapt recipes I knew and loved from my pre-vegan and gluten-free days.
Those recipes I tried that were suited to my new dietary requirements were usually just full of white carbs and sugar, to 'substitute' for other ingredients. None of which I really wanted to eat on the regular.
As you'll probably know by now if you've been reading for a while, I love my whole food ingredients. And it makes me extra happy when I can make desserts with them that actually taste delicious.
As this Vegan Gluten Free Sponge Cake is DELICIOUS.

THE RECIPE
Being a fan of English Victoria sponge cakes from my childhood, I'm so happy to have come up with this alternative! I have really fond memories of eating sponge cake when I was younger, so it's lovely to recreate it.
I recently took this cake to friends for afternoon tea and we demolished the whole thing in an hour!
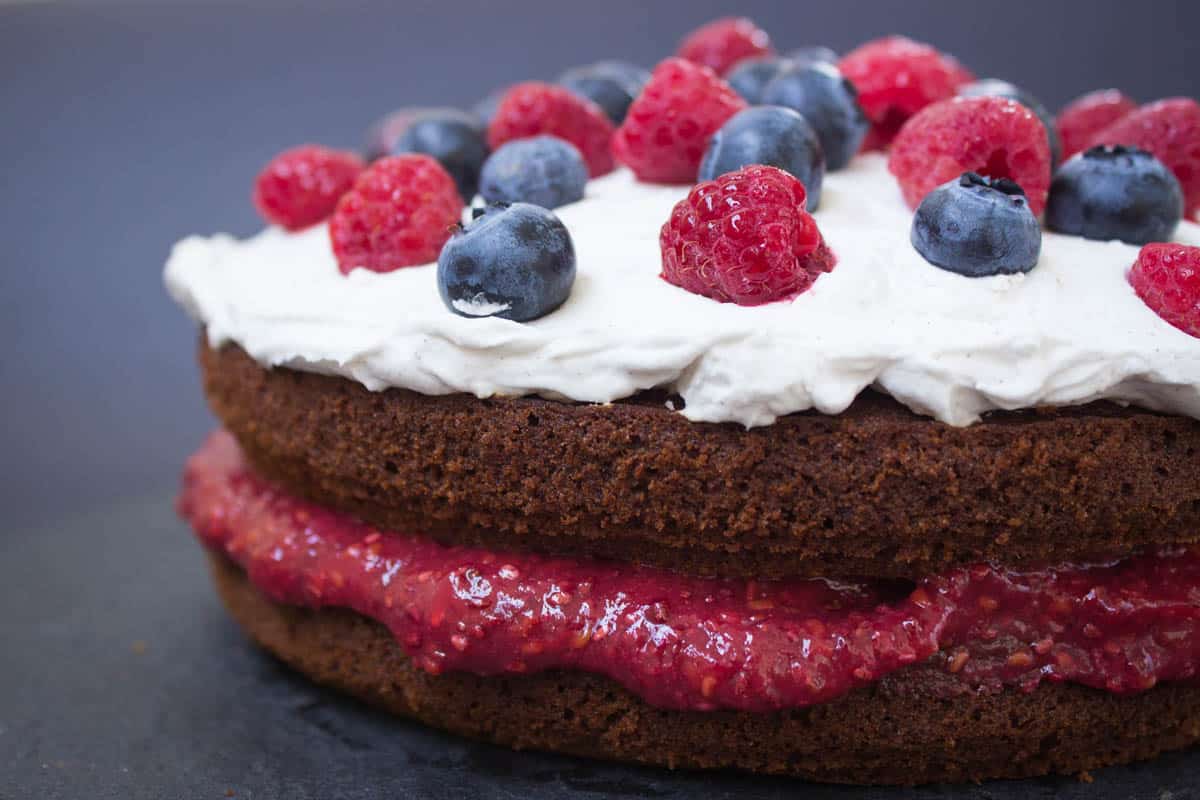
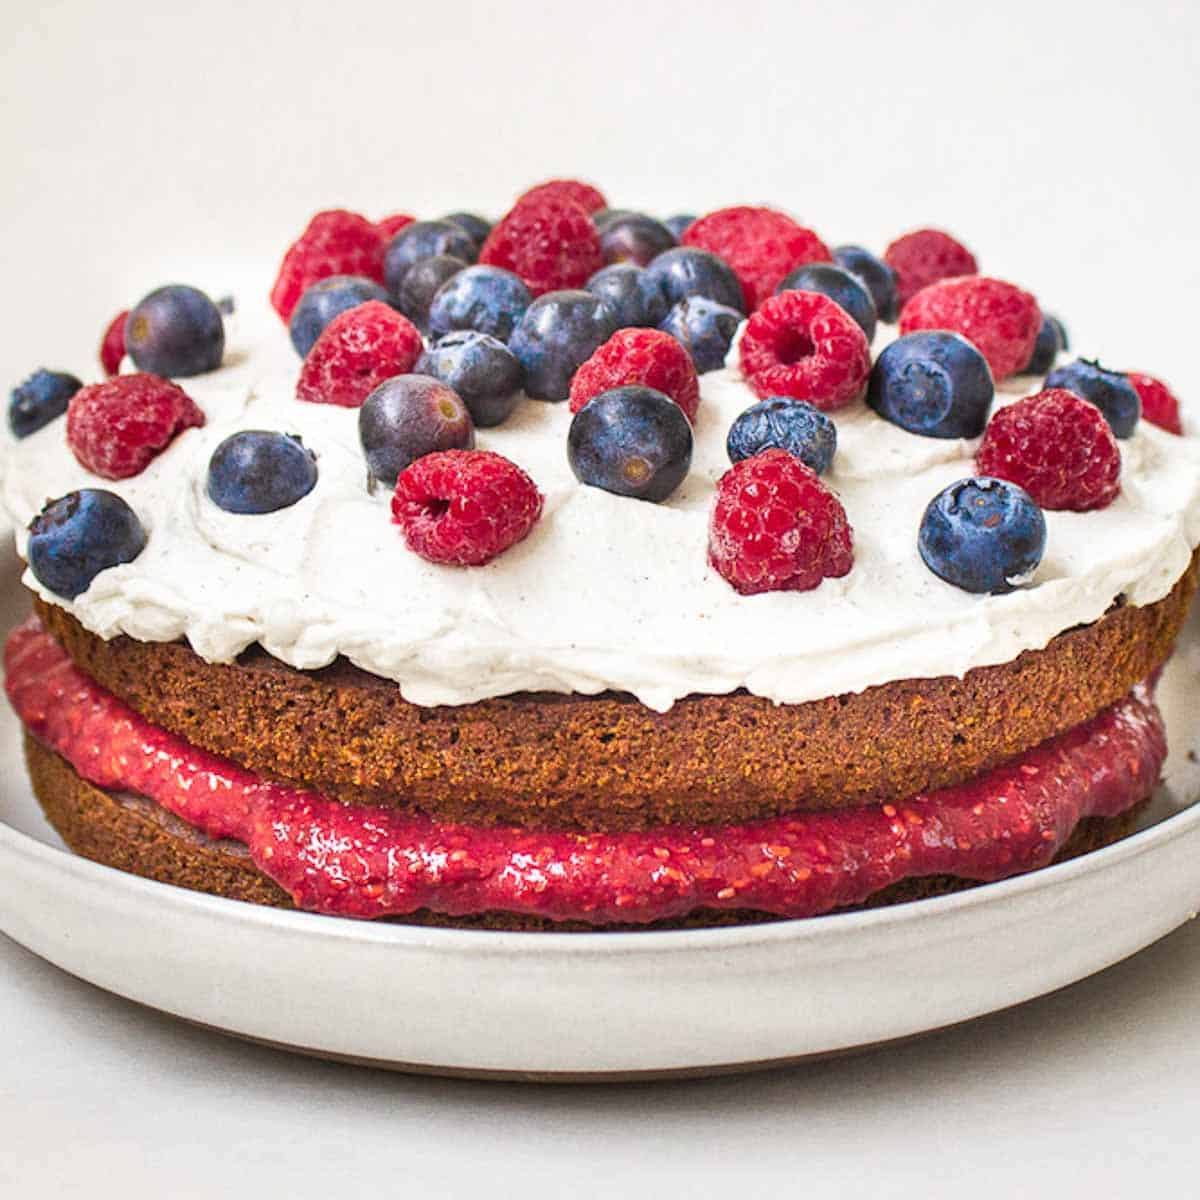
This Vegan Gluten Free Sponge Cake is a satisfying, spongy vanilla cake. When combined with jam and a coconut whipped cream topping it's really decadent.
Sprinkle it with a handful of whatever berries you have lying around and it looks mouthwatering. If you're aiming not to eat it all in one sitting, then good luck!

INGREDIENT NOTE
Applesauce - This refers to apples peeled, stewed for 20 minutes and blended. No added ingredients (except maybe a little water to stop the apples burning the pan).
You can absolutely buy if you like (you can find unsweetened applesauce in your local shop) but I tend to make my own as it's cheaper.
If you're going the DIY way, you'll need about 3 medium-sized apples to get the 1½ cups of applesauce needed for this cake. Any leftovers work really well on top of cereal of yoghurt.
MORE VEGAN GLUTEN FREE CAKES
Vegan Gluten Free Chocolate Cake
Vegan Gluten Free Sponge Cake
Ingredients
For the cake
- 1½ tablespoon ground flaxseed, mixed with 4 tablespoon water and set aside for 15 minutes
- ¼ cup melted coconut oil
- ¼ cup maple syrup, coconut nectar or agave syrup
- 1½ cups applesauce (unsweetened)
- ¾ cup almond or coconut milk (unsweetened)
- ¼ cup coconut sugar
- ½ teaspoon sea salt
- 2½ teaspoon baking soda
- 1½ cups ground almonds
- ¾ cup brown rice flour
- ¼ teaspoon vanilla essence or powder
For the jam
- 1½ cups raspberries (frozen or fresh)
- 2 tablespoon chia seeds
- 2 tablespoon maple syrup, coconut nectar or agave syrup
For the cream
- 1 400ml can coconut milk (chill a can of high quality coconut milk in the fridge overnight. Drain the water from the can and use only the hardened cream that separates from the liquid. Store in the fridge until ready for use.)
- 1 tablespoon maple syrup
- ¼ teaspoon vanilla essence or powder
- Mixed berries, to decorate
Instructions
For the cake
- Preheat the oven to 350°F/175°C.
- Grease two 18cm cake tins with coconut oil and line the bases with parchment paper.
- In a large bowl, whisk the flaxseed, coconut oil and maple syrup/coconut nectar until combined.
- Add the applesauce and almond milk and whisk again for several minutes until the mixture is smooth and airy.
- Add the coconut sugar, salt, baking soda, ground almonds, rice flour and vanilla and stir until the mixture is combined and lump-free.
- Divide the mixture evenly between the two cake tins and bake for approximately 45-60 minutes (until a knife comes out of the centre of each cake relatively clean).
- Turn the cakes out onto a wire rack and leave to cool completely.
For the jam
- Gently heat the raspberries in a saucepan for about 15-20 minutes, until they are totally broken down.
- Remove from the heat, stir in the chia and maple syrup and leave the mixture to thicken for 15 minutes (the chia seeds will swell and make the mixture more jam-like).
For the cream
- Chill a large bowl in the freezer for 10 minutes.
- Using an electric whisk, beat the hardened coconut milk in the bowl with the maple syrup and vanilla until the cream is totally lump-free and fluffy (see my step-by-step guide to making your own coconut whipped cream here).
- Spread the jam in an even layer on top of one of the cakes, sandwiching the second cake on top of it. Spread the cream on top of this in a rough layer, and decorate with mixed berries. Enjoy!
Notes
If you’ve tried this recipe, please leave a comment or tip for others below. I'd love to know how you’ve made it your own!
Follow Vancouver with Love on Instagram, Pinterest and Facebook!